


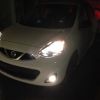
 Big White
Wynter, I definitely prefer your OEM mud flaps.
The pair i have come with rusted screws... I am not going to use these on my car.. nope.. no way.. I will get stainless ones from Reno Depot tomorrow.
http://www.ebay.ca/itm/331138867041?...%3AMEBIDX%3AIT


 Reply With Quote
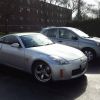
 "Josa"
 Nebula29

 Daughters Nissan 'Sara"
 Grasshopper
