


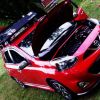
 Cherry Bomb
To get the badge to the correct side of the grill takes a little more work than one would think. Since this seems to be a popular add on, I decided I'd shine a little light on the subject.
For this mod to be done properly as in good enough to charge labour for, you will need a few things.
Tools
Small flat head screwdriver
5/16 wrench
Pliers (Any kind other than cutters will do.)
Supplies
Blue thread sealant
Black spray paint. + (Primer if you have it around but not essential.)
Cable ties
It came with two backing plates, two threaded studs and two 5/16's nuts.
The first thing I'm going to do is paint the backing plates black. This will prevent them from rusting as well as make them near invisible at first glance. Last thing you want is is shiny parts behind your grill starting to rust.
Next your going to want to coat the end of your studs in sealant and screw them into the back of your badge. Be careful not to cross thread the studs and when you have reached finger tight use your pliers to give it a little more torque. Not too much just about an eighth of a turn. Be sure you get the pliers as close to the badge on the stud as possible, you don't want to mess up the threads on the back half of the stud.
Then the best approach to mounting is by cable tying in your badge exactly where you want it to sit. This way you will not need that third hand to hold your badge while trying to slide on plates and spin nuts. It will span across two openings and you want to be level so one stud will touch the top of one opening and the bottom of the other.
Now you are ready to remove the push pins, use the flat head to pry the center of the pin up, remove them all it's just easier this way, don't forget the 3 pushed in horizontally that are holding the plastic rad cover. Now you will be able to lift the top skin of the grill assembly to slide out the rad cover. It will feel loose but still attached somehow. It is not, it is just hung up on obstacles. The two pieces you removed the horizontal push pins from on the passenger side of the cover are a little tricky. The inside mount crosses down in under the outside mount. Take a good look and remember this as that is the tricky part to reassembly. I marked the pushpins for orientation, H=Horizontal V=Vertical
By gently pulling, prying and maneuvering the cover, you can remove it from it's place and get access to the back of the grill. At this point it would be good to make a note of what side is the top. It can be confusing, at first glance you may try to reinstall upside down with no luck as I did.This is what your cover will look like removed.
Now all you have to do is install your backing plates and nuts. Put some thread sealant on your stud before installing the nut. I installed my plates vertically to get maximum coverage, and therefor maximum hold. Be careful not to snug the nuts too tight. Remember your grill is just plastic, also you will notice the edge of your badge will slip over the lip of the opening and pulling in and making your badge look crooked if you go too tight so watch for that as a first sign of going too tight.
Once that is done you are ready for reassembly. Start by putting you rad cover back in. This is tricky at first, take your time and concentrate on where your mounts have to go and how you need to bend the cover to get it in there. I think the hood release mechanism is the major culprit hindering reassembly. Pop the cover in under that and it's all down hill from there. Push you plastic pushpins back in and close your hood, you should be looking at something like this.


 Reply With Quote